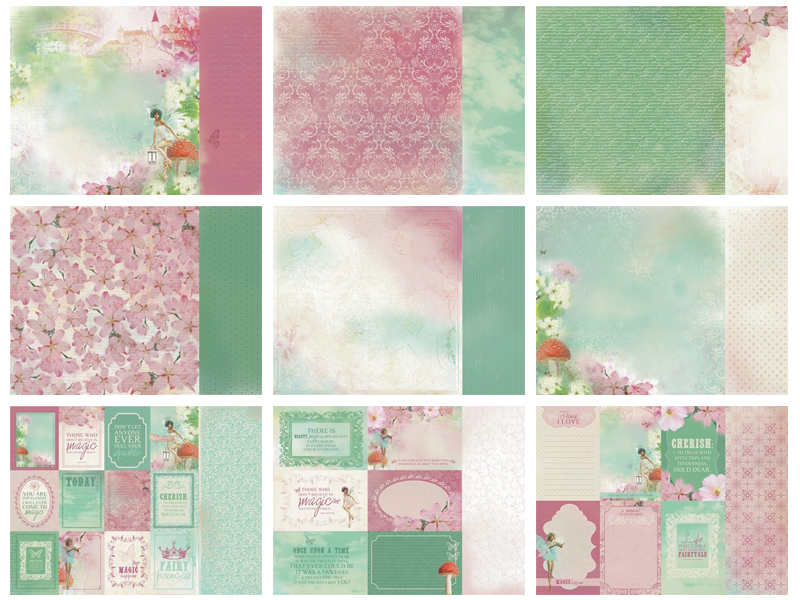
Monday, May 20, 2013

Secret Garden Inspirations


Hello dear crafters.

I hope everyone is having a good time, had the chance to visit and get hold of new beautiful goodies at Paper Lane and most of all crafting the day away. I’m really excited to share with everyone today a garden of inspirations.

The Secret Garden from Graphic 45 is really beautiful and fun. There are lots of projects for this paper line that you can come up with as I did.
 First inspiration…
Secret Garden Spinner Album
 To spin your creativity and keep those ideas flowing…

 This is a larger and taller spinner album version . There are 12 pages in the spinner with a page size of 5 ¾ x 8 inches. So, lot of different photo sizes can be placed on it up to 6x4inches and perhaps some notes too. The papers are already beautiful and blends so well with each other.  Here are some of the pages...
 
 There are also lots of designs that can be cut out that I had also used it to embellish the pages. Well, except for the pearls and trims {can’t help myself with that}. Additionally, I have also used the stickers from this collection. 

 This spinner album makes a perfect centerpiece in your home, a keepsake or a gift. Or it can also be great for a school projects, etc…hmmm a lot of spinning ideas to come up with!!


Second inspiration…
Tags
Well, I have cut outs left after making the spinner album so I decided to make a couple of tags.
 

 I ran two Inkssential craft tag size#8 with different embossing folders. Applied Ranger Shabby Shutter and Ranger Dusty Concord distress inks on the violet tag while on the pink tag I applied Prima old rose and pastel green chalk inks. The flowers were made by hand stitching a lace then topped it up with a flower made using Tim Holtz Alterations Tattered Florals die. Added all the elements together and the tags were done.

 These tags were dressed up front and back and this is how the backside of the tag looks...


Third inspiration…
Best Friends Card
 This card was made using one of the new arrivals at Paper Lane, the Radiant Rectangles Spellbinder Nestabilities die. 
 

 Beautiful paper line and spellbinder dies...just imagine all the projects and possibilities you can come up with. Again the flower was made using the paper from the collection and Tim Holtz Alterations Tattered Florals die. 


Fourth inspiration

Layout with a box
Yes, literally a layout with a box. Well, maybe it looks like a paper frame or shadow box. One thing for sure…the young lady in the picture is my great inspiration to come up with this unique layout.


This paper folding technique is great for layering and adding dimensions to a page. I really loved how this page turns out. The page is 12x12inches and the box in it measures 10x10inches. Cut out the Secret Garden paper and used it to layer inside the box. Decorated the box frame with cut out and punch papers, lace and pearls.

I’m so glad to share my ideas and I do hope that I have inspired you today. Do let Paper Lane know if you are interested in my projects.

From my garden of inspiration to yours…let your creativity flows.

Hugs,
Irene

Sunday, May 12, 2013

Secret Garden Off-The-Page Class

Learn to create a gorgeous off the page project with lots of layers and fussy cutting designed by Irene Retuya! 
For more info, call the store at 04-3443633 or email info@mypaperlane.com. DON'T MISS THIS CLASS!!!


Wednesday, May 8, 2013

Family Layout

The beautiful Life Time paper line by Prima inspired me to scrap a family photograph taken on my birthday a year ago at Bab Al Shams.  With half our family living in South Africa it was and is a pleasure when we are all together.  I love this photograph taken before we started to feast and enjoy the nights entertainment.


 This collection is so suitable for a family layout what with one page containing words like family, memories, together, cherish, etc. and another with tags and sentiments among other things.  I used software on my computer to change the original colours of the photograph to various hues of brown - it suited the paper tones perfectly.  The tag with the green ribbon bow slides behind the layers of paper - I will use this tag for my journaling - the black alphas read Bab Al Shams 30-12-2011.

The 12x12 sheet I hot glued onto black chipboard.  I tore the paper somewhere in the middle, added some soft netting I sometimes use on my layouts  and a bit of matching lace to stick out slightly.  I used two layers of patterned paper from the collection before adhering the photograph.  Tore into the paper at the left hand corner and curled it so that they followed some kind of order.

I used many different masks, templates, pastes, glimmer mists and distress inks to alter the sheet I chose for my layout - yeah then I went and layered all my embellishments and now the effects are only peeping out :-)  I just had to add the camel for the desert effect!


The chipboard heart is by dusty attic and frames all our smiling faces beautifully.  I used various dabbers on the chipboard.


The black key is also a Prima embellishment.  I clustered 4 flowers from the collection and placed the pink flower on top - I love how the petals peed out! The little tag that reads smile I fussy cut from one of the sheets of paper.


The flowers are also from the collection.  With the exception of the lace and 3 material flowers everything I used in this layout is available at Paper Lane including the camel.  There are other matching elements available in this collection; it is beautiful and perfect for layouts, cards, mini albums, anything.  Pop into the store and get yours now!

I hope you enjoyed viewing my layout...until next time happy crafting!  Janine


Sunday, May 5, 2013

Echo Park Scoot Album


Hello! Today I have a very special album to share with you.

Probably you've already guessed what makes it so special :). It's my sweet baby boy Alex! This is the first papercraft project I made for him and my very first boy project too! So, no flowers and bows here :)

For this project I used papers and stickers from the Echo Park Scoot collection (available at Paper Lane) and very basic office stationery supplies. Even though Scoot is not a baby collection, I really like how it turned out. The bright colours and the busy designs do reflect my boy's strong personality and I really see him in his true colours in this album!

I decided to make a project which will help me collect the pictures from Alex's first months and later on be able to see how he's changed over his first year. We do take photos of our children every day, but how often do we print them? 

The album is divided in 12 pages - one for each month to 12. I used a very basic paper office file (bought for 0.75 fils!) which I cut and folded to form the album's cover. Then I dressed it up with the pretty Scoot papers which made it quite sturdy. After that I cut and folded the individual pages and attached them together using book rings. I kept the decoration very simple and let the photos speak for themselves.

Here's how the album looks inside:


The way I cut the 12x12 pages (6" x 12") allowed me to make two pages per sheet and when I folded them (7 1/2" x 4 1/2") I got pages able to hold at least 4 photos each. 


I used the small "flap" as a mini scrapbook page where I marked the month (using stickers from another Echo Park collection - For the Record 2).


The Scoot collection is too busy and bright, so I tried to keep everything inside the album as clean and simple as possible. A few stickers, a heart, banner or star. They did the job for me! And I must say I have never used so many stickers on a project before, but I did realize stickers are great - they save time and are super fun and easy to work with. I guess I'll be using them more often on my projects :).
 

Each page comes also with a journalling card where I will write the important milestones from Alex's development. Something that is really important to me!


Here come more pages:


Precious, isn't it? I am so glad I took the time to select, print and arrange the photos to make this little keepsake!

I hope you enjoyed my take on the Echo Park Scoot collection.

Thanks for stopping by and happy crafting,

Lidiya

Tuesday, April 30, 2013

Glow In the Dark Clock

Hi Paper Lane-rs  today I wish to share with you an Ikea photo frame that I altered into a clock using Martha Stewart's glow in the dark paint on the hour numbers and clock hands.
This is the Ikea photo frame I used ...


I wanted a shabby chic old look so I painted the surface of the clock with brown paint.  When the paint was dry I applied crackle paint and left it on my balcony to dry naturally and over night.  Then I brushed on a layer of white acrylic paint to allow the crackle to appear - loved the effect!


The clock hands and numbers have many layers of the glow in the dark paint.  When you apply so many layers of the glow in the dark paint it becomes like a thick film so half way through the painting process I pulled off some of the layers so that the gold of the clock hands shone through.  Then I applied a few more layers and that gave the effect of the clock hands having a weathered aged effect too.


I used white dabber on a wooden clock trinket - I positioned the clock hands with a brad and adhered to the center of the oval shape - look pretty good don't you think??!!

Next was just decorating with different flowers, I also added a bird and a birdhouse ... simple and clean just the effect I wanted.


I kept the style pink and shabby to go with the gifts I made my daughter for her birthday as she laid claim to the clock while I was in the midst of creating.

PRODUCTS USED

Martha Stewart vanilla bean acrylic craft paint
Martha Stewart weather crackle effect
Martha Stewart glow-in-the-dark finish

Adirondack snow cap acrylic paint dabber
Adirondack metallic copper acrylic paint dabber 
Jenni Bowlin malted milk paint dabber

En Francais A4 Paper Stack
Amy Tangerine Letter Stickers

Prima wood embellishments
Prima shabby chic treasures

Pink artifical flowers
Various white flowers

All these products are available at Paper Lane and more.  Paper Lane stocks the entire range of Martha Stewart craft products;  from stencil crafts to glass and glitter crafts, clay and molds and a vast selection of acrylic paints that are an absolute pleasure to work with. Go get your supplies now!

Happy crafting...Janine

Wednesday, April 24, 2013

True Friends {Carta Bella} Inspirations

Hello dear crafters.

It's time to celebrate true friendship...time for sharing...and I'm happy to share my ideas and inspirations with you all. I hope you heard this saying "think outside the box" and if you do just don't forget the box. I sure didn't forget mine and I have a triple box of inspirations and much more! The Carta Bella True Friends collections are so beautiful, fun and colorful and just right for these ideas and projects.

 Beautiful Day box card
This is a regular version (vertical or portrait type) of box card made out of cardstock. I have fun dressing it up with Carta Bella True Friends collection, a few die cuts, doily and coordinated sticker.


 This is how it looks inside the box card...

 Simply leave it as it is or add a photo inside the box...makes an amazing card to gift a friend.


True Friends Easel Box card
I have came up with different versions of the box card.  This one is a combination of easel card and box card.
 

And because it is an easel card, it looks like the friends have a playground to play. You can always use that part to write a message for the receiver, just mat it up with a plain cardstock or maybe write directly on it. The flowers were simply made using Tim Holtz Alterations Tattered Florals die and an adhesive pearl at the center.


The back view of the easel card...the more reason to display this card.


 And when the easel card is close...


 Friendship Box Tag
Yes, a box in a tag or a tag with a box. I was so delighted when this idea came into mind...a simply wonderful and creative idea. 


 I love how it is see through and I use the solid color papers from the collection to die cut. Decorated both sides and covered it up with transparency (acetate).


Now, let's have a look on another inspirations outside the box.

True Friends Layout

Here is a layout on friendship using this paper collection. A glimmer misted and masked page with fussy cut outs, punching, die cut flowers, die cut butterflies and sticker from the paper line.


Here is another project, something beyond the page...a frame. Perfect base for creating a home decor or a gift to a friend.

 Live Laugh Love Frame

The frame measures 30x40cm. I have used the new Prima Mix Media doll stamps and did some paper piecing. The background behind the dolls was created using modeling paste dabbed with a stamp to add a stucco texture then directly applied  Prima pastel chalk inks. The layout on the frame are behind the glass while the bird, flowers and leaves are outside the glass.


 The flowers were made from the same paper collection and using Heartfelt Creations Vintage Floret  die (HCD 727) one of the many new dies available at Paper Lane.


 I have fun creating and designing these projects. I hope I have inspired you and you'll give them a try.

If you are interested to recreate any of these projects, visit Paper Lane and book your place.

Cheers,
Irene

Friday, April 19, 2013

New Arrivals from Sizzix

Happy Friday dear readers!

Let us show you some very new arrivals that we've received recently, which are all part of the CHA 2013 Winter Releases:

Sizzix / Echo Park Framelits Dies Set with Stamps

Cut what you see.  It's that easy and efficient with Framelits.  And with the included clear stamp set, there's no need to search for just the right sentiment or embellishment to complement your next paper crafting challenge.


We've also received the much-awaited  2013 Tim Holtz Sizzix products! They are in limited quantities so hurry and grab your fave pieces before they are all gone.


RESTOCK of SIZZIX PRO DIES and MACHINE

Big Shot Pro  and  Big Shot machines are back in stock. Paper crafters just can't get enough of our Sizzix Big Shot range! The manual die cutting machines’ durability, ease of use and compatibility with a lot of dies are what sets them apart from other die cut machines in the market. The Big Shot Pro, in particular, has been most awaited by a long list of clientele eager to get their hands on the efficient and versatile machine. 


 All NEW JustRite Rubber Cling and Clear Stamps


All NEW McGill Paper Blossoms Collection Puncher Set 


 All NEW Teresa Collins Far and Away Collection


Hope to see you soon :)

Happy weekend!